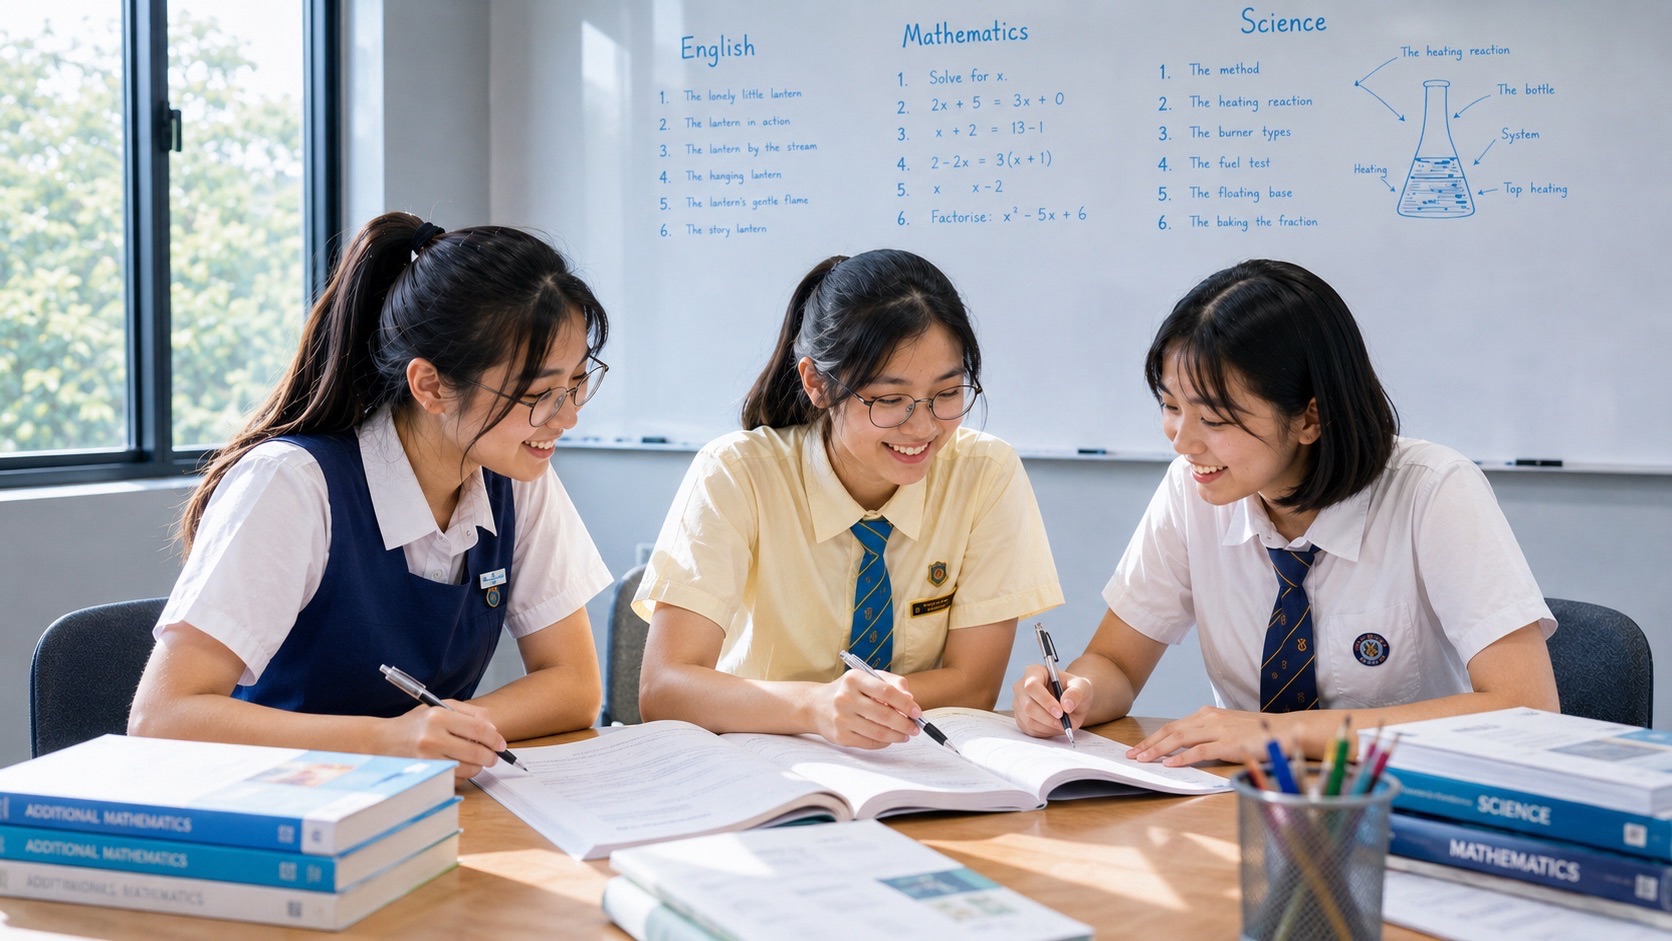
Why does Secondary 1 G1 Mathematics small groups tuition work for some Bedok families? In a class of three, a tutor can watch each student mark an angle, choose a height or label an answer. Those first few decisions often reveal where the student needs help. A child may remember the formula for area and still use a sloping side as the height. Correct that step, then ask the child to try a different diagram independently. That is the kind of progress a parent can see on paper.
At eduKate Singapore, the three-student format gives each learner time to show their own working and explain it before comparing approaches. For a Bedok student, the immediate aim is to make current schoolwork more manageable, from signed numbers and early algebra to angles, symmetry and measurement. In geometry, that means turning a picture into a reasoned solution. Over time, the same habits support preparation for the Singapore-Cambridge Secondary Education Certificate (SEC). Ask about current class times and location through the eduKate Singapore enquiry page before planning the journey.
- Bring one recent worksheet and the school’s current topic list. Start with a question your child began independently.
- Check what goes wrong first. Look for a misread diagram, an unsuitable rule, an arithmetic slip or a missing unit.
- Build four habits in order. Mark the facts, choose a relationship, show the calculation and check what the answer measures.
- Ask to see a fresh question done without prompting after the lesson, including one with a different diagram orientation.
- Keep school assessment dates separate from the eventual SEC examination year. Use the school’s coverage for current revision and the relevant examination syllabus closer to the national examination.
Contents
What a Bedok family can check before choosing tuition to Why three students can make geometry lessons useful
Read a geometry diagram before applying a rule to Circles and composite figures with readable working
Reason through the faces of a solid to Practise the habits that will matter for the SEC
Questions parents and students can bring to a first lesson to Choose one question for the next school week
What a Bedok family can check before choosing tuition
Open an exercise book at a geometry page and ask your child to choose a question they remember attempting. Give them a pencil and a blank sheet. Ask them to copy only the relevant lines and mark what the question actually tells them. A student who recalls a teacher’s calculation may still struggle to identify which angle sits on the straight line. A student who remembers the drawing may be able to give the right reason with slower arithmetic. These two students need quite different lessons, even if they earned the same mark.
Keep the conversation small enough for your child to finish it. One question and five quiet minutes are enough. The parent’s role is to ask what was certain, what had to be found and where the pencil stopped. If the answer is “I don’t know”, ask the student to point to one number on the page and tell you what it measures. A 6 printed next to a line may describe its length. A 60° printed inside an arc describes a turn. Reading those two marks successfully gives the session a place to begin.
Save three pieces of evidence for a discussion with the tutor. The first is the question as presented. The second is the original working, including anything crossed out. The third is a line from the child explaining what they were trying to do. A neatly copied correction is useful later, when you compare it against the first attempt. The original attempt shows the tutor which decision came naturally. A child who wrote “I thought those two angles were opposite” gives the tutor a concrete starting point.
Travel matters to the quality of a weekly lesson. For a child coming from around Bedok Town Centre, Bedok Reservoir or the Upper East Coast side of the estate, the journey after school may feel different from the same route on a Saturday. Use the appointment address and the scheduled start and finish times when deciding. Try the journey at the relevant time if it will be tight. In a workable week the student has time for food, arrives ready to attempt a question and can still fit a short independent review into another day.
A parent can make the first decision with a simple question. What should my child be able to write independently by the next review date? A possible answer is “find an unknown angle on a straight line and name the reason without help”. Another is “choose perpendicular height when the diagram is tilted”. Either is more observable than asking whether confidence has improved in general. Confidence often becomes visible when the student turns over an unfamiliar question and can write a useful first line.
Where geometry fits in Secondary 1 G1 Mathematics
In the Secondary Mathematics syllabus, the first year of G1 includes number operations, ratio, percentages and introductory work with algebraic expressions and number patterns. For geometry and measurement, students meet angle relationships, line and rotational symmetry, calculations for several plane shapes and solids, and unit conversions. They also learn to collect, display and interpret data. Schools organise that material across the year, so your child’s class notes and teacher’s instructions are the guide to what is due next.
An early question may ask students to evaluate a rule such as 3n + 2 when n is 4. The working is 3 × 4 + 2 = 14. The same habits apply when a student uses a geometry formula. They have to know what each symbol represents, substitute the appropriate value and keep the steps in a readable order. Pupils who get lost in a diagram sometimes benefit from switching between the picture and a short line of algebraic substitution. Those who know the formula but misuse it often need more time with the picture.
The first-year angle work gives students several families of reasons. Adjacent angles along a straight line total 180°. Angles around one point total 360°. Opposite angles at an intersection are equal. When a line crosses a pair of parallel lines, corresponding and alternate angles are equal, and interior angles on the same side add to 180°. A family can build a very small set of revision cards by drawing a pair of labelled angles on the front and putting the appropriate relationship on the back. Check the school’s vocabulary before writing the cards.
Mensuration is the word students may see for finding measures such as area, perimeter, volume and surface area. During Sec 1, a student may find the area of a triangle, parallelogram, trapezium or circle, use the circumference of a circle, work with composite shapes, or calculate measures of cubes and cuboids including composite solids. Even within one exercise, the question might change from boundary length in centimetres to area in square centimetres. Word choice and units at the end are evidence that the child followed that change.
The syllabus places topics such as Pythagoras’ theorem, solving linear equations in one unknown and graphs of linear functions in Secondary 2 G1. A family looking at secondary worksheets from a different level may see such material much earlier. Bring that sheet to the tutor if it interests your child, and agree on how it fits the school’s current plan before making it the focus of revision. A young student can have an excellent first term by doing the present material accurately and independently, including the less conspicuous details of signs, scale and units.
Contents · Previous section · Next section
Find the first decision that needs teaching
Consider this made-up question. A straight line passes through O. A ray starting at O divides the straight angle into two angles. One is 128°. Find the other angle. Janelle answers 52° with no working. Adam writes 180° − 128° = 52°. Mira writes 180° − 128° = 62°. Lay the three responses side by side. The missing lines in Janelle’s answer leave her method unknown. Adam has shown the calculation and could add the geometric reason. Mira seems to have selected the right operation and needs an arithmetic check. Three similar answer boxes lead to three different conversations.
Give Janelle a second diagram that is drawn roughly and shows the same relationship with different numbers. Ask her to indicate the straight line, explain why it matters and then calculate. If her method holds across both diagrams, she can work on making the reason visible. If she guesses based on size, start by making 180° meaningful. A strip of paper running through the vertex, or two arrows pointing in opposite directions along the same ruler, can establish the straight line regardless of which way the page faces.
For Mira, isolate the subtraction. Work from 128° up to 180°. Add 2° to reach 130°, then 50° to reach 180°. The missing angle is 52°. Ask her to check that 128 + 52 = 180 and that 52° is acute. She can then write the subtraction using the school’s preferred layout. This quick check gives her two ways to notice that 62° would give a total of 190°. If she frequently reaches the right estimate and gives the wrong exact result, the tutor can practise a few targeted computations alongside the geometry.
After the students compare answers, give each a fresh item. At a point on a straight line, a known angle is 47°. The other is 133° because 180° − 47° = 133°. Change the sketch orientation for one version and turn the page for another. An angle can be obtuse in any orientation. The relationship remains visible once the student follows the two outer rays along the same line. A student ready for a small extension can explain why a companion angle to an acute angle on a straight line is always obtuse.
Keep these observations tied to a single piece of work. A child who needs hints to choose a rule in one diagram may choose it independently in another. At the end of the week, ask them to find one angle in a fresh diagram, complete it and tell you where they checked the answer. Write the date and the shortest useful description of the result. “Chose 180° and checked with addition on a tilted line” helps at the next lesson. “Careless” tells the child very little about what to do next.
Contents · Previous section · Next section
Why three students can make geometry lessons useful
A three-student group can give each learner an explanation to hear, a different piece of working to compare and an uninterrupted turn with the pencil. In one sequence, each student marks a diagram privately, then each says which information they used. The tutor can see whether two learners copied each other once the discussion began or both saw the straight line independently. The second practice item can target one common misconception while each learner still completes their own version.
Suppose a lesson starts with two intersecting lines, with one angle given as 68°. A student may write 68° for the opposite angle and 112° for a neighbour. Another may label every angle 68°, extending a rule past its limits. The third may understand the relationships but forget which letter labels which angle. A tutor can ask the first learner to explain which rays continue through the vertex, give the second a number check using 180°, and ask the third to follow the named rays with a finger before writing. Each child can then do a separate intersection question from a clean start.
A good turn-taking routine matters as much as the class size. If one student always answers first, the quietest learner may go through an hour without making a visible decision. A family can ask how the tutor builds in written thinking time and how often each student presents a first attempt. “Everybody shows their marked diagram before we talk” is a concrete answer. Tutor feedback can then name what the child selected independently, where a prompt helped and what to try at home next.
Compare several pieces of evidence across lessons. Can the child select the right relationship when the sketch is rotated? Is the reason present when the teacher’s model has been put away? Is a wrong answer detectable through an addition check or a unit check the child actually remembers to make? Give enough time to see progress across more than one problem, while paying attention to how the class handles a first difficult lesson. A student can take time to settle and still show a useful gain in one specific skill.
Questions about fit can have different answers across families. If the student needs repeated one-to-one support through every line, ask how the group will balance that need with other students’ turns. If the student already works accurately and mainly wants a predictable hour to revise, a school practice routine might meet the immediate need. If your child benefits from seeing a mistake explained and then has enough time to try again alone, the small format offers a practical way to build that cycle.
Contents · Previous section · Next section
Read a geometry diagram before applying a rule
Use the diagram like a record of stated facts. Parallel lines may have matching arrow marks. Equal lengths may have matching tick marks. A square corner indicates 90°. An angle marked with a little arc points to the opening between two specific rays. When a question says that A, O and B lie on a straight line, follow them in order and mark any angles that divide the turn from OA to OB. A quick visual guess can guide a check after the calculation, while the written facts determine the calculation itself.
Say the names out loud if reading them is hard. In ∠AOB, O is the vertex. The two rays are OA and OB. If two angles share O but have different outer rays, pointing to the vertex alone will not distinguish them. Imagine directions on a map drawn for a practice exercise. The angle formed by the path to the left of a meeting point and the path to its right might be 180°, while the angle between the left path and a side path could be 65°. Naming the endpoints tells the reader which turn to measure.
Try a short example at a point. Four consecutive angles around O are 95°, 80°, 105° and x°. The first three total 280°, so x = 360 − 280 = 80. Write the final result as “the missing angle is 80°”. The student may check that 95 + 80 + 105 + 80 = 360. If they originally used 180° after seeing a line segment, ask them to trace with a finger all the way around O and notice the turn they were asked to complete.
Now combine two facts in a different view. Two straight lines intersect at O. One angle is 124°. Its opposite also measures 124°. The two neighbouring angles are both 56°. One calculation is 180° − 124° = 56°, using the angles along a straight line. A second reason gives the opposite 56°. Parent and student can verify that the four angles total 360°. Each line of working follows from a single relationship, so a teacher can see exactly where the student’s reasoning succeeds.
One useful test for a parallel-line drawing is to mark the two crossing points on the same transversal. Colour the order of the angle openings around the first crossing using small pencil strokes. Then find the matching position at the second crossing. If the chosen angles correspond and the lines are parallel, their measures are equal. If two interior angles lie on the same side of the transversal and one is 118°, the other is 62°. Check which pair the question asks for before calculating. A correctly calculated 62° can still describe a different angle.
For independent practice, sketch two roughly parallel lines and a transversal, then add the parallel marks. Label one interior angle 73°. Find the alternate interior angle and the same-side interior angle. The alternate interior angle is 73°. The same-side interior angle is 107°, since 180° − 73° = 107°. Next draw the same arrangement turned on the page. Ask your child to locate the counterparts with the new orientation and explain how they matched the angles. Two accurate explanations say more than the first pair of numbers alone.
Contents · Previous section · Next section
Tell boundary, surface and space apart
A student walking a made-up rectangular route near a Bedok sports court traces a boundary. A student covering a rectangular display board uses area. A student filling a rectangular box considers volume. The same numbers may appear in several questions. The words and units tell the student what to calculate. At home, trace the edge of a workbook, wipe its front cover and point to a closed carton’s interior. Give each action its mathematical name and let the child supply a matching unit.
Take a rectangle 12 cm long and 7 cm wide. Its boundary length is 12 + 7 + 12 + 7 = 38 cm. Its area is 12 × 7 = 84 cm². A cuboid with the same rectangular base and a height of 5 cm has volume 84 × 5 = 420 cm³. A label around a single edge does not require the total boundary. A wrap that covers the whole carton without overlap needs surface area. For this 12 cm by 7 cm by 5 cm carton, the surface area is 2 × (84 + 60 + 35) = 358 cm².
Ask your child to write the requested measure above the arithmetic. For a container volume question, they can put “space inside, cm³”. A fresh problem might ask how much paper covers the outside of a closed cube whose edges are 4 cm. The area of a single face is 16 cm². There are six square faces, giving 96 cm². If only the top is covered, the answer is 16 cm². If the question asks the space inside a cube with an interior edge of 4 cm, the answer is 64 cm³. Reading one key word changes the count or operation.
Unit conversions can be checked with a small sketch. One metre is 100 centimetres. A square metre has 100 rows of 100 one-centimetre squares, making 10,000 cm². A cubic metre has 100 layers of 10,000 one-centimetre cubes, making 1,000,000 cm³. For example, 48,000 cm² equals 4.8 m², while 48,000 cm³ equals 0.048 m³. Take the units from the object you measure and convert all needed lengths to the same unit before applying a formula, or convert the finished measure with its correct square or cube factor.
Try the two methods with a 200 cm by 50 cm mat. Using centimetres first gives 200 × 50 = 10,000 cm² = 1 m². Converting the side lengths first gives 2 m and 0.5 m, so the area is 2 × 0.5 = 1 m². Both methods agree. For a child who moves the decimal point by memory, this paired example shows what the conversion factor means. A parent can use the second method as a check on another problem with different dimensions.
Contents · Previous section · Next section
Find the height even when the shape leans
Draw a parallelogram with a 14 cm horizontal base, a 9 cm sloping side and a 6 cm perpendicular height. Move a triangular piece from one end to the other in a rough sketch. The outline changes into a rectangle with base 14 cm and height 6 cm. The area stays 84 cm². A child who calculated 14 × 9 = 126 cm² can now point out where that 9 cm belongs. It describes an edge, useful for a perimeter calculation. The height describes the perpendicular spacing between the parallel sides.
A triangle has base 14 cm and perpendicular height 6 cm. Its area is half of 14 × 6, giving 42 cm². A turn of the page can make the selected base look vertical, and a sufficiently tilted triangle may require the perpendicular height to meet an extension of the base. Ask the student to mark the right angle first. The act of adding the small square supplies a check on the choice of height. A student can explain the area by pairing two identical triangles to make a parallelogram of the same base and height.
For a trapezium, identify the parallel sides. In one example their lengths are 8 cm and 12 cm. Their perpendicular separation is 5 cm, and one sloping side is 6 cm. The area is half of (8 + 12) × 5, giving 50 cm². Test the formula visually by sketching a second copy turned through half a turn and joining it to the first. The combined parallelogram has a 20 cm base of two joined lengths and the same 5 cm height. Its area is 100 cm², so either identical half has area 50 cm².
An independent check should change which details are tempting. Suppose a parallelogram has base 11 cm, a sloping side of 8 cm and perpendicular height 7 cm. Its area is 77 cm². Its perimeter is 2 × (11 + 8) = 38 cm. Give those questions to a child on different days. If they use 7 cm for the perimeter, ask them to trace the boundary and check whether the height line is one of the edges. If they use 8 cm for area, ask them to point to the right-angle marker. Each check directs their attention to a specific feature.
A tutor can walk three students through these figures with different prompts. One draws the right angle before doing anything else. Another describes why rotating the page leaves the base-height relationship intact. A third explains whether the spare length is relevant to the requested measure. Rotate those roles on the next question so each child develops all three habits. Well-chosen drawings help the group discover a common idea, while personal working shows who can use it when the group discussion ends.
For a short home activity, draw a base of 10 cm and a line parallel to it 4 cm above. Put the third vertex of a triangle at different points on the upper line. The resulting triangles can have quite different-looking edges, including one with the perpendicular height outside the triangle. Every triangle has area 20 cm² because its base remains 10 cm and its perpendicular height remains 4 cm. When the student says “the corner can slide”, ask what stays fixed. A small spoken explanation often makes the formula easier to remember a week later.
Contents · Previous section · Next section
Circles and composite figures with readable working
Draw a circle around a pretend planting bed. Its radius is 3 m. A path around the edge would follow a circumference of 2π × 3 = 6π m. The soil inside covers π × 3² = 9π m². If a school question asks for decimals to two places, the answers using the calculator’s π key are 18.85 m and 28.27 m². Leaving π in an intermediate line helps preserve accuracy until the requested final rounding. Follow any value of π or precision specified by the question.
A common trap arrives in quieter language. The width of a circle across its centre is 10 cm. That length is the diameter, so the radius is 5 cm. Its circumference is π × 10 = 10π cm and its area is π × 5² = 25π cm². Ask a student to draw and label two radii on the diameter before calculating. One copy of the sketch gives a tutor a quick way to see whether the student confused the circle’s two lengths. For a transfer problem, label the diameter vertically so the student has to read the endpoints through the centre.
A composite figure can be solved by adding pieces or subtracting what has been removed. In a draft plan for a display board, an 11 cm by 8 cm rectangle loses a 3 cm by 2 cm rectangle from its top-right corner. The area left is 88 − 6 = 82 cm². A second route splits the remaining shape into an 11 cm by 6 cm lower rectangle and an 8 cm by 2 cm upper rectangle. The pieces give 66 + 16 = 82 cm². The student can mark the new dividing line with a light stroke and see how each piece fits.
For the perimeter of that same board, walk round the boundary. Starting at the bottom-left corner and proceeding along the bottom edge, the lengths are 11 cm, 6 cm, 3 cm, 2 cm, 8 cm and 8 cm. The perimeter is 38 cm. Cutting out a corner removed 3 cm and 2 cm of the original boundary and added new edges of those lengths, so this perimeter matches the original rectangle. When a cut is taken from the middle of an edge and introduces two new sides into the outline, the result may change. Draw both situations and ask the child to trace before making a forecast.
Here is a different composite measurement. A rectangular sign is 10 cm wide and 12 cm high. A semicircle sits directly above the top edge with its diameter along that edge. The area is 10 × 12 + ½π × 5² = 120 + 12.5π cm². To find the boundary, count the bottom 10 cm, the two upright sides of 12 cm each and a semicircular arc of length 5π cm. The perimeter is 34 + 5π cm. The straight join between the rectangle and the semicircle lies inside the finished shape. Tracing the outside helps the child decide which line belongs in the total.
A three-student discussion suits these problems if each learner draws before comparing answers. In the corner-cut problem, one student can show subtraction, one can show addition and one can check that the two methods cover the same region. Give all three a fresh shape where the cut moves from the corner to the middle of an edge. Have each handle both area and perimeter independently. The change tests whether they learnt a transferable skill or only repeated the first sequence of numbers.
Contents · Previous section · Next section
Reason through the faces of a solid
Use a paper model before relying on a formula for a composite solid. Imagine two cubes of side 3 cm joined along a full face, with no overlap. Each cube has volume 27 cm³, so the total volume is 54 cm³. Each cube has surface area 54 cm², giving 108 cm² altogether before joining. The two faces touching become hidden. Subtract 2 × 9 cm² to obtain an outside surface area of 90 cm². A separate check treats the result as a 6 cm by 3 cm by 3 cm cuboid. The surface area is 2 × (18 + 18 + 9) = 90 cm².
Consider a cuboid of base 8 cm by 5 cm and height 2 cm with a 3 cm cube sitting on its top. The cube sits completely on the top face, with one whole face touching. The combined volume is 8 × 5 × 2 + 3³ = 80 + 27 = 107 cm³. The outer surface area before joining is 2 × (40 + 16 + 10) + 6 × 9 = 132 + 54 = 186 cm². Subtract 18 cm² for the two touching parts to obtain 168 cm². The hidden patch on the cuboid measures the same as the hidden face of the cube, even though its full top is larger.
Ask how you would wrap the object with paper if all its exposed faces had to be covered. A student can place a pencil mark on each surface that remains visible when turning the model. A different check calculates the large cuboid’s top as 40 − 9 = 31 cm² and adds the cube’s five visible faces, giving the same result. For volume, ask how many whole 1 cm³ blocks fit each component. The visible and hidden areas do not change how many cubes fit when the solid parts are joined without overlap.
A parent who wants a quick diagnostic can use a cube of edge 2 cm joined to a cube of edge 4 cm, with the small cube resting on one face of the large cube. Give each measure its own line. The volume is 8 + 64 = 72 cm³. The sum of the separated surface areas is 24 + 96 = 120 cm². The joining face has area 4 cm² on each side, so the visible surface area is 112 cm². Ask why two patches disappear from the count. A child who subtracts only one patch can cover both joining faces in two different colours before placing them together.
Contents · Previous section · Next section
Use symmetry as a testable idea
Line symmetry asks whether a reflection across a line sends the whole shape onto itself. Rotational symmetry asks how many times the shape matches its starting outline through one full turn about a fixed centre, counting the full turn. A square has four lines of symmetry and rotational symmetry of order four. A non-square rectangle has two lines of symmetry and rotational symmetry of order two. Tracing the figure on a scrap of paper lets the learner test each claim. Ask them to put a small corner mark on the tracing so they can see how far it has turned.
A familiar shape is a useful warm-up. The vertical and horizontal lines through the centre of a non-square rectangle both work as mirror lines. A diagonal fails, since a reflection sends the long edge into the direction of a short edge. A half turn works. A quarter turn puts the long sides where the short sides were. For a square, all four sides are the same length, so the quarter turn works. This paired example helps a child see why a chart learned by heart might fail when they meet a new outline.
Try a grid exercise on squared paper. Make a 3-by-3 shaded square and attach one extra cell at the middle of its top edge. The new figure keeps the vertical line of symmetry. It loses the horizontal line, both diagonals and every matching rotation short of the full turn, leaving rotational symmetry of order one. Have the student reflect the extra cell and test where it lands.
For a fresh practice activity, mark identical tabs at the midpoints of the top and bottom edges of a rectangular card and ask your child to test both mirror lines and the half turn. Then move the top tab along its edge and the bottom tab the same distance in the opposite direction, while keeping the tabs in matching positions after a half turn. The half-turn symmetry remains. Generally the shifted pair breaks the two original mirror lines. Using a rectangle with unequal sides and small tabs placed away from the corners helps keep the example clear. This activity turns a seemingly memorised topic into a short investigation.
Contents · Previous section · Next section
A practical six-week sequence at home
During week one, collect a baseline. Ask for a single angle question and a single measurement question already covered in school. Use unprompted work first, and keep the original. Find out whether the same kind of snag appears in both. A student who starts every operation before reading the last sentence may need a routine for identifying the target measure. A student who identifies the target correctly and chooses the wrong number in a diagram may need a mark for the vertex, the radius or the perpendicular height.
In week two, make the angle reason visible. Choose one relationship that has appeared in class. Set up two diagrams with the same relationship, one simpler and one turned on the page. Ask the child to write the named reason next to each calculation. Cover the teacher’s example for the second question. If the reason vanishes when the drawing changes, put both diagrams side by side and ask the student to circle the same part in each. Finish with a check that the angles sum to the expected turn where appropriate.
In week three, shift the focus to units. Write “boundary”, “surface” and “space” on three slips and ask which one fits an everyday object question. A box with side lengths in centimetres can prompt all three units across separate questions. For one question, use dimensions stated in metres and centimetres. Give the child time to make the units consistent before using the formula. Preserve a good solution as a model for the next attempt, including its final unit.
In week four, use comparison. Give one parallelogram or trapezium item with a spare length and one angle item with two candidate relationships. In each case ask what the extra piece of information could be used for and why it is unnecessary for the current target. At this point the student has a reason to read the words carefully. Someone choosing a sloping side for area can put the boundary working alongside the area working and see that both lengths have a legitimate place.
During week five, revisit a correction from several days earlier. Use a new drawing and different numbers with the same structure. If a student needs help, offer a prompt at the earliest point where the working stops. “Trace the boundary” is a smaller prompt than declaring all the lengths to add. “Which length touches the right angle?” is smaller than giving the formula substitution. Note how much help was needed, then let the child complete the working as independently as possible.
In week six, assemble a small mixed check using only what the school has taught. Four varied questions can be enough to identify the next step. Include one angle reason, one simple measure, one unit conversion and one diagram that requires a choice of length or boundary. Ask the child to choose which question to attempt first. Afterwards choose one error to correct fully, including a fresh question with the same structure. Use the comparison with week one to decide whether the family needs to keep the same focus, move to another topic or try the routine independently for a while.
Contents · Previous section · Next section
Practise the habits that will matter for the SEC
The first national examination under the SEC takes place in 2027. The 2027 G1 Mathematics syllabus listing gives K110 as that year’s G1 Mathematics subject code for school candidates. This is a useful reference for seeing how national assessment is organised. A student currently in Sec 1 will take the national examination in a later year and should check the published subject entry and assessment details for their own year. The 2027 examination syllabus places Geometry and Measurement in Paper 1. Its directions make clear that essential working counts and that the question can set the required precision. A Secondary 1 learner can start by naming the angle relationship or labelling the perpendicular height before writing the calculation. In a circle problem, keep enough digits during the working and round the answer as the question asks. For current school tests, follow the term coverage, instructions and calculator guidance that your child’s school provides.
Some of the most valuable preparation begins without a full test paper. Write measurements with units on the same line as the answer. Use diagrams to keep track of parallel lines, parts of a whole and faces to count. Put down enough working that another person can follow an unfamiliar solution. Round at the stage requested and check whether the result is plausible in context. A student who can read back their own work a week later has a practical advantage when revising independently. Their notebook tells them which relationship they used and where to examine a mistake.
Full Subject-Based Banding allows subject levels to differ. Your child’s timetable or subject confirmation from the school tells you what Mathematics level to plan for. If the family is considering a more demanding level later, ask the school when it reviews that decision, what evidence it uses and how a change would affect the child’s weekly load. A strong geometry result can be part of the conversation alongside steadier performance across other topics and the student’s own readiness. Tuition can help provide clearer samples of independent work to discuss with the school.
When school assessment guidance becomes available, convert it into a short list of behaviours to rehearse. If an exercise asks for reasons, check the reason and the calculation in the same practice session. If the major topics include composite figures, include questions where the region is split and ones where a region is subtracted. If the paper asks for answers to a stated precision, include one item with an exact result used in a second calculation, then round only the final answer. The method and reading are easier to improve when feedback identifies a single action.
Contents · Previous section · Next section
Questions parents and students can bring to a first lesson
What should we bring if the main problem is careless mistakes?
Bring several independent attempts where the child understands part of the work. Look for patterns. A child might copy the wrong number from a crowded diagram, use 100 to convert an area instead of a length or change degrees into centimetres on the final line. Each source calls for a different check. A tutor who can identify the point of change can suggest a brief verification routine that fits the child’s pace. Keeping every previous mark in the workbook gives the tutor more to work with than an adult’s cleaned-up copy.
My child sees the angle relationship but does not write it down. What practice helps?
Pick one relationship the student can already explain, then have them put one reason next to the calculation. For 180° − 65° = 115°, the reason might be “angles on a straight line”. Put a related exercise in a different position on the page and ask for the reason again. Give the student a chance to write before discussing. If the language is the difficulty, ask the Mathematics teacher what abbreviations or phrases they accept and keep the same wording across home, tuition and school practice.
Is there a better time to start with schoolwork?
Start when you have a current example the student can discuss and enough space in the week to review it. A family can try a small home routine first after a busy CCA period or while schoolwork is still settling. If the same obstacle prevents progress over several lessons, a structured group may supply frequent observation and another way to hear the explanation. Ask about class composition and how the tutor would handle differences in current school coverage. Base the decision on whether the proposed work fits the student’s timetable and next learning target.
How will we know group discussion is turning into independent learning?
Ask to see work done before the discussion and a separate fresh task done after it. A student who listens well can often nod through a convincing explanation. An independently written reason on a new diagram is stronger evidence. A useful progress note says “picked the 7 cm perpendicular height in a new diagram and gave cm² without a prompt”. If the student needed a hint, record the hint and review that stage again. This makes the next lesson easier to plan and the feedback easier for the child to use.
What if a timed test makes the student rush past the diagram?
Spend a short amount of time marking the given facts and target. Practise this on two questions at a comfortable pace before trying under a time limit. Mark the vertex of an angle, circle the word “perimeter” or add the right-angle symbol for a height already described as perpendicular. The mark should guide the next line of working. Practise the same action on fresh questions until the mark feels like part of solving. Then reduce the total time gently while keeping the accuracy check at the end.
Contents · Previous section · Next section
Choose one question for the next school week
A Bedok family considering Secondary 1 G1 Mathematics small groups tuition can start with a worksheet and a five-minute conversation. Choose either an angle problem, a shape with a height or a measurement with mixed units. Ask your child to point out what is known, choose the relationship and write the result in full. Take the first attempt to the lesson and agree on a related problem the student will do afterwards. A useful next lesson ends with the learner able to make one more decision confidently on a fresh page.